Review: SuperimposeX - Photoshop-like editing on iPhone

Superimpose allows you to layer two photos and to remove parts from the photo of the upper layer so the other photos basically shines through. It's an ideal app to change the background of photos like to add some dramatic clouds, fix a boring sky and so on. It's really easy and fun to use.
Today the developer released and update for Superimpose App that adds, among other things, two nice tools the make the app even easier to use:
smart brush that helps you to avoid erasing unwanted areas
Background editing tools.
The workflow of the app is still simple: First, load a background photo, then a foreground photo and finally select the areas of the foreground photos that you want to erase. I'll demonstrate how to use the app with a photo from the Campanile di San Marco in Venice and a sky shot that I took close to Vienna.
But before you start, make sure you've enabled high-resolution photo editing and saving; otherwise your resulting photo will be just around 4 megapixel. The setting is hidden in the help menu. Tap "?" in the upper right corner, scroll down and set resolution and working image size to "high".
Now let's go. Here's a quick tutorial about how to replace the background of a photo in less then a minute:
First load the background image by tapping on the icon in the upper left corner.

Crop the background If you need an e.g. square background. Tap "Choose" to continue.

Tap the icon in the upper left corner again. Now choose "Photos" under "Import Foreground".

Once you imported the foreground photo, you can resize, rotate and even skew it by dragging one of the handles.
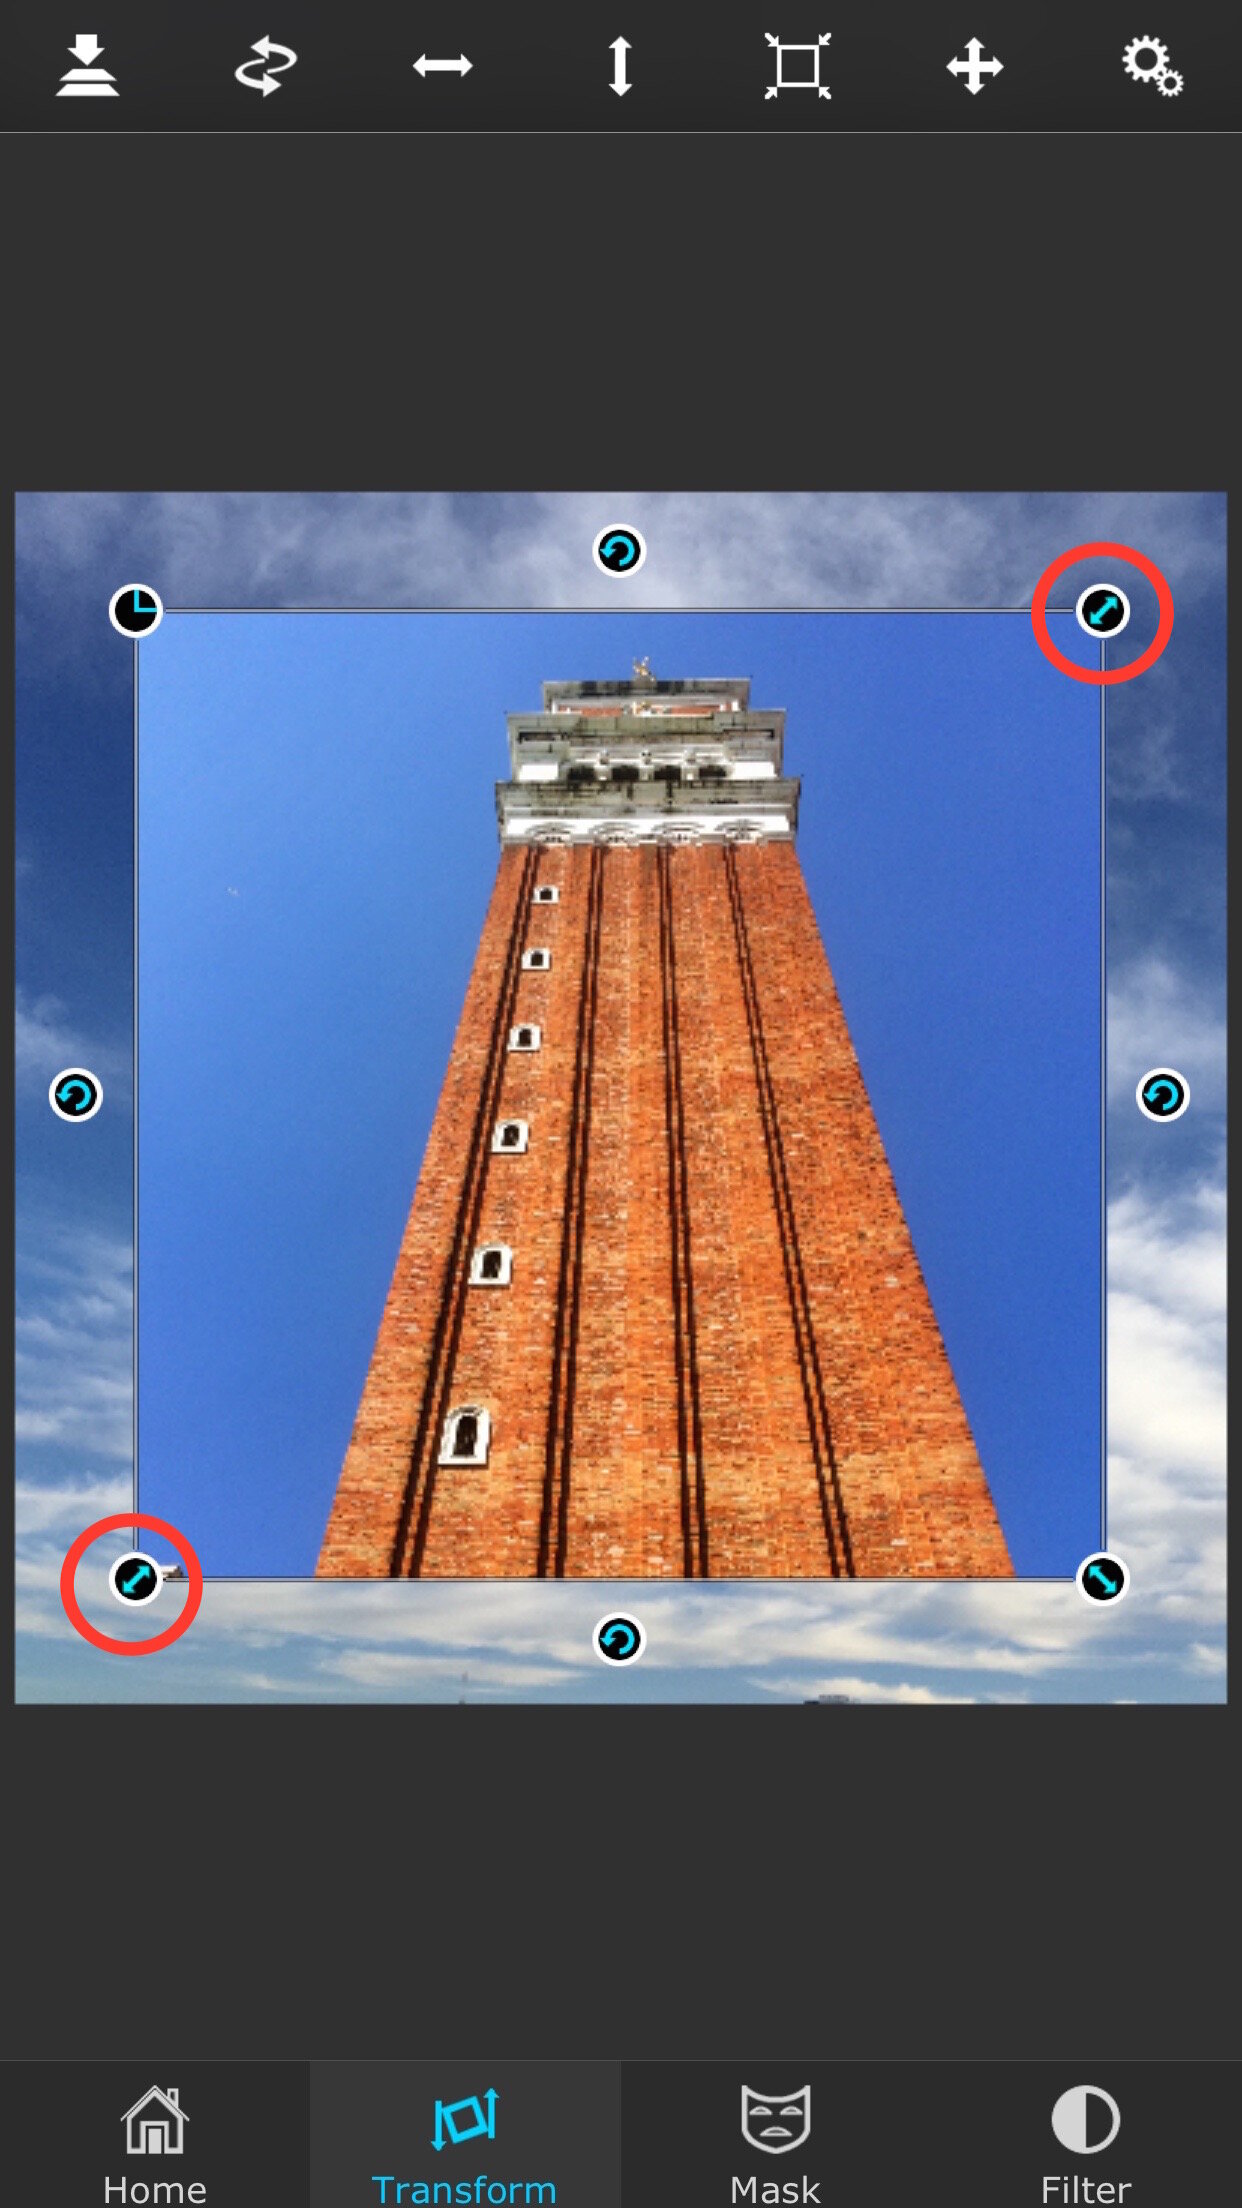
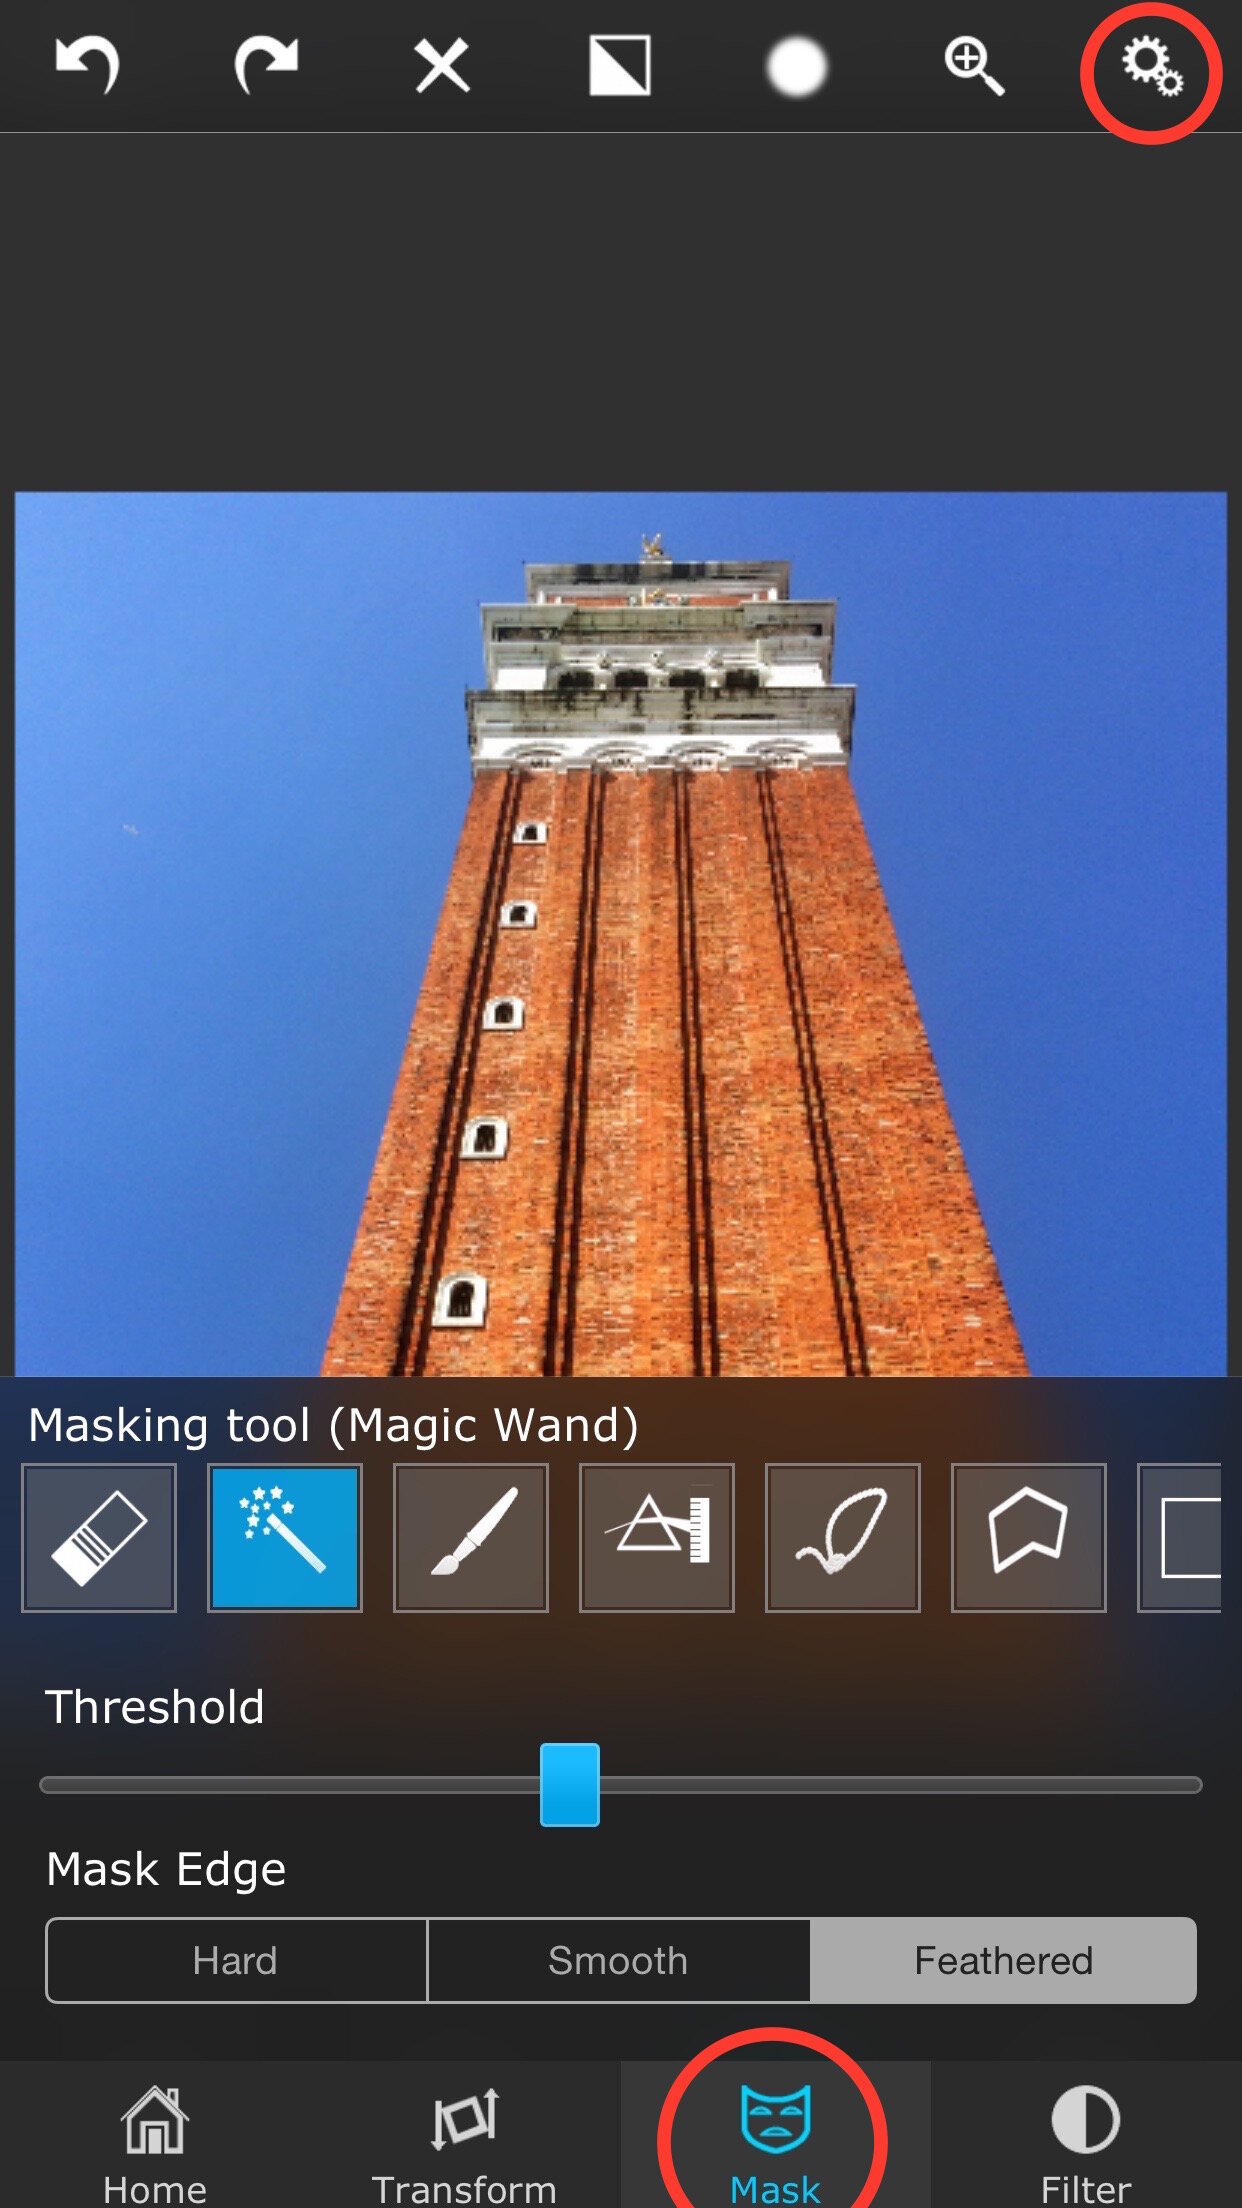
Now we need to remove the blue sky. Tap "Mask", then the gear icon in the upper right corner. Choose the magic wand tool. As we remove a very uniform color, we will use the magic wand tool for that.
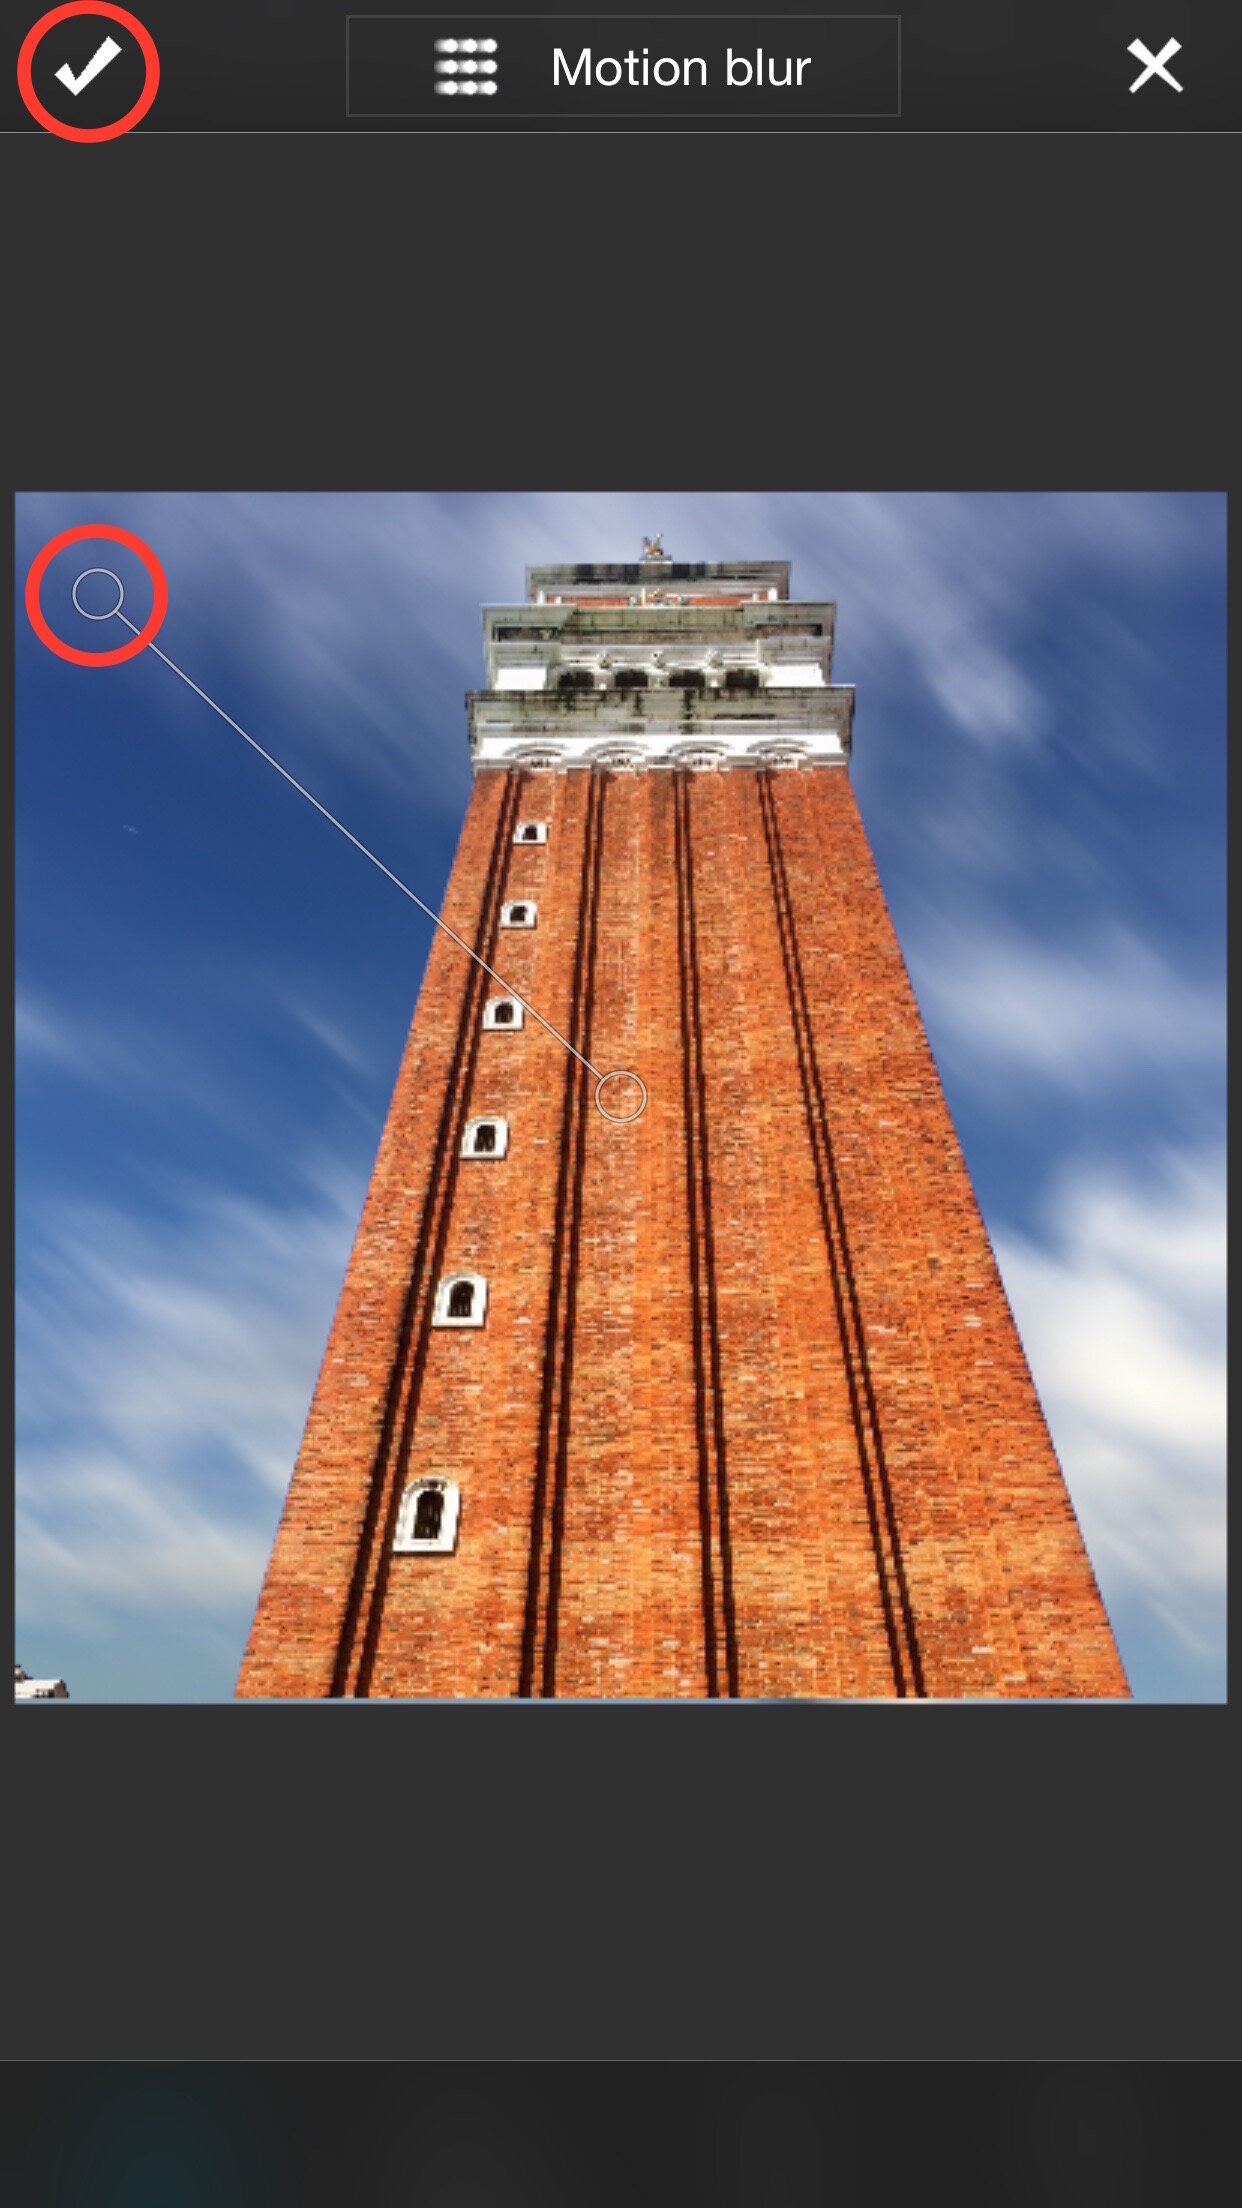
Next we'll create a nice moving clouds effect. Tap the tools icon and then select to edit the background photo, then tap the top bar saying "perspective". A menu will appear. Select "Motion Blur"

Drag the line in any direction to set the movement direction. Drag the line away from the center to increase the amount of motion blur, move it towards the center to decrease the amount of motion blur to apply

Don't forget to save your work by tapping on the share button. Select which metadata you want to keep, select the JPG quality and export your masterpiece to the Camera roll.
This is the basic way how the app works and that allows you to quickly replace the background of a photo on your iPhone. You can even remove the background completely by choosing a color or gradient as your background instead of a photo at the beginning.
The different masking tools and brushes allow you to create even sophisticated masks to remove the background from almost any photo.
